

Welcome to the second chapter of the series DevOps Essentials, where we will take a practical hands-on approach to learning Kubernetes. I will also explain the architecture of Kubernetes and important concepts like Pods, Clusters, Nodes, and useful tools like Minikube and Killercoda.
This series is specifically designed to help developers who are new to DevOps gain a solid understanding of all the essential Cloud Native tools and paradigms. Make sure to subscribe to our newsletter so you don't miss an episode. Let's Begin!
Why is Kubernetes?
Instead of starting with formal definitions of Kubernetes and "container orchestration", let's start with WHY you should care so that you understand the relevance of Kubernetes instead of rote-learning it as a concept. And it ties back to Docker.
In the last chapter we talked about Containerisation, docker, how to build a docker image, run your containerized application, and push it to Dockerhub.
It's important to recognize that managing containerized applications in production environments can present certain challenges.
One such challenge is the manual management of containers. Docker allows you to run containers individually, but as your application expands to multiple containers or multiple instances of the same container, coordinating and scaling them becomes increasingly cumbersome. This is where the need for a container orchestration platform like Kubernetes arises.
One of the key problems that Kubernetes solves is container scheduling and scaling. It intelligently schedules containers, ensuring efficient resource utilization and optimizing performance. Additionally, Kubernetes enables horizontal scaling by automatically adding or removing container instances based on workload demands, ensuring your application can handle varying levels of traffic.
Now you understand the relevance and importance of Kubernetes and container orchestration.
Before we talk about Kubernetes architecture and how it actually works, let's get you a taste of using Kubernetes. We will skip the boring installation part by using an online cloud-based Kubernetes playground!!
Let's start using Kubernetes!
Killercoda is a platform that provides a Kubernetes playground on the cloud. It allows users to spin up Kubernetes clusters and experiment with Kubernetes features and functionalities without the need for local installations or infrastructure setup.
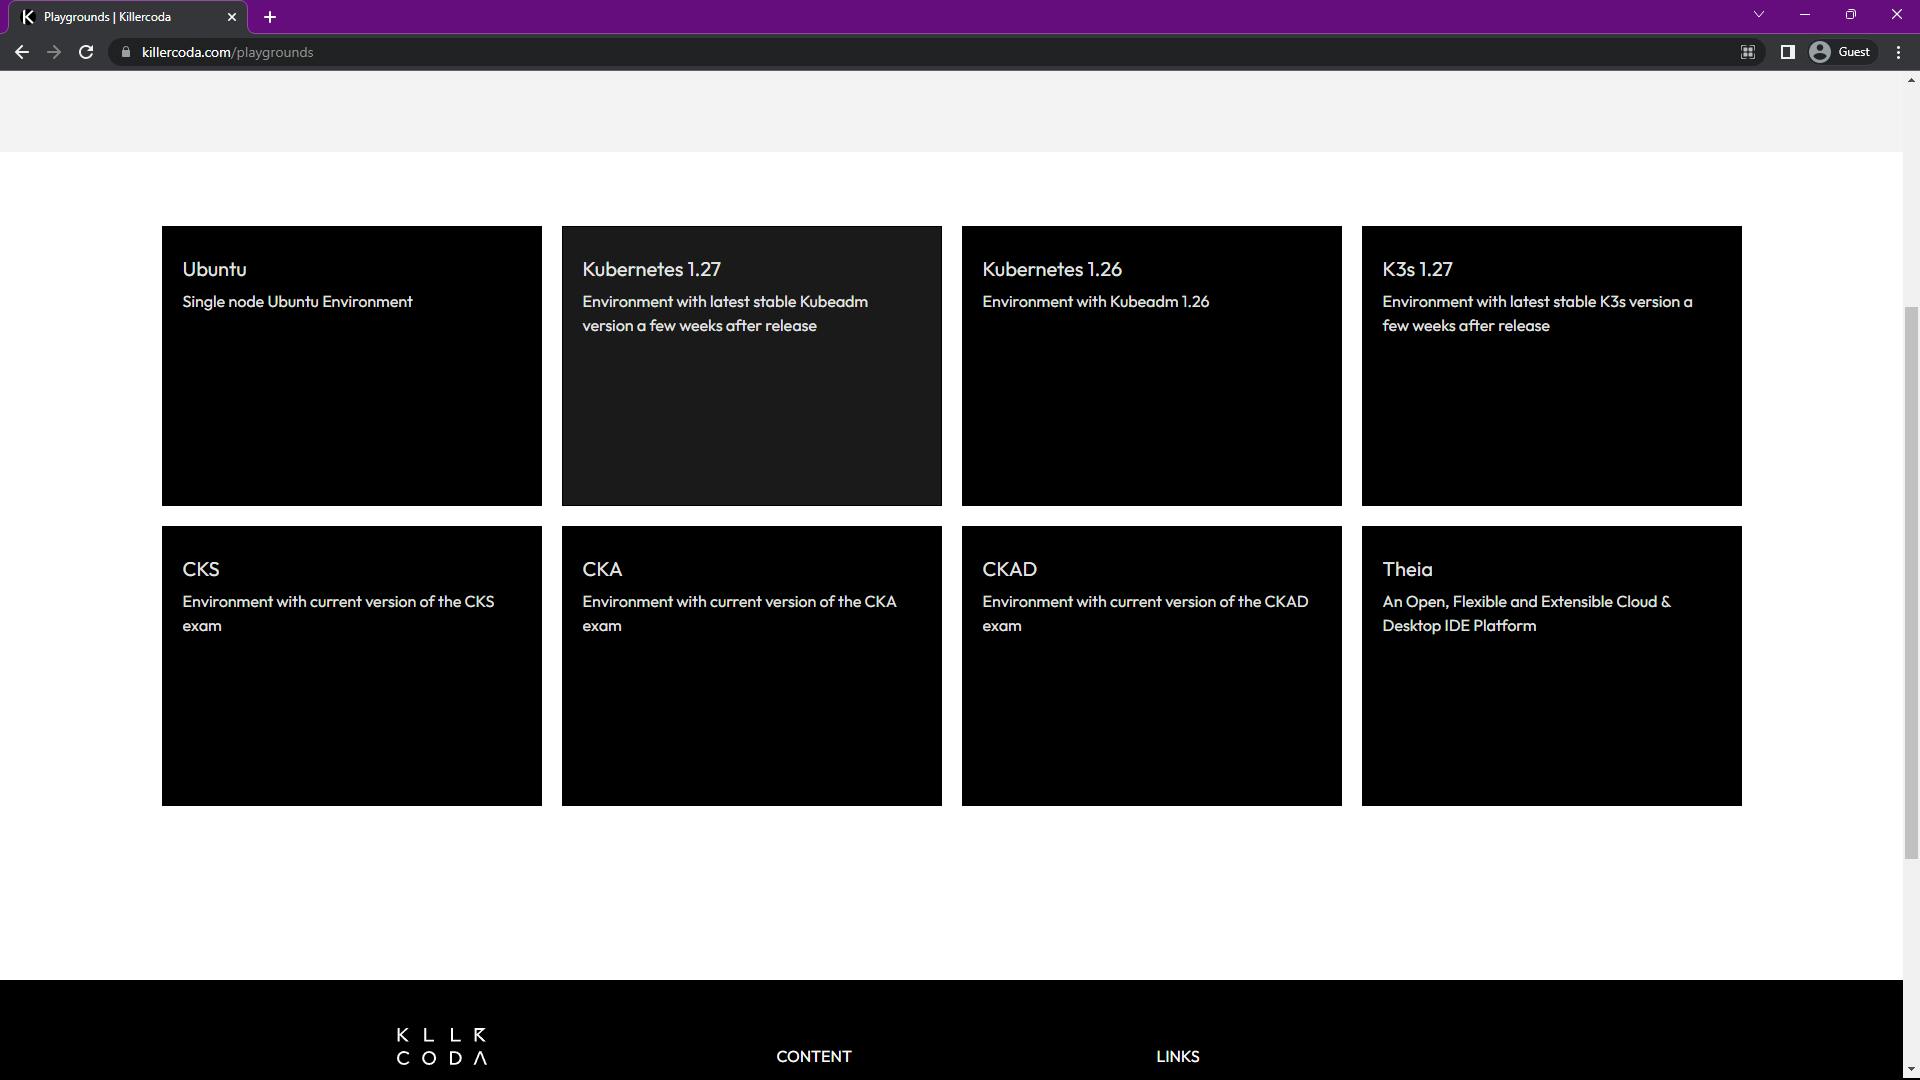
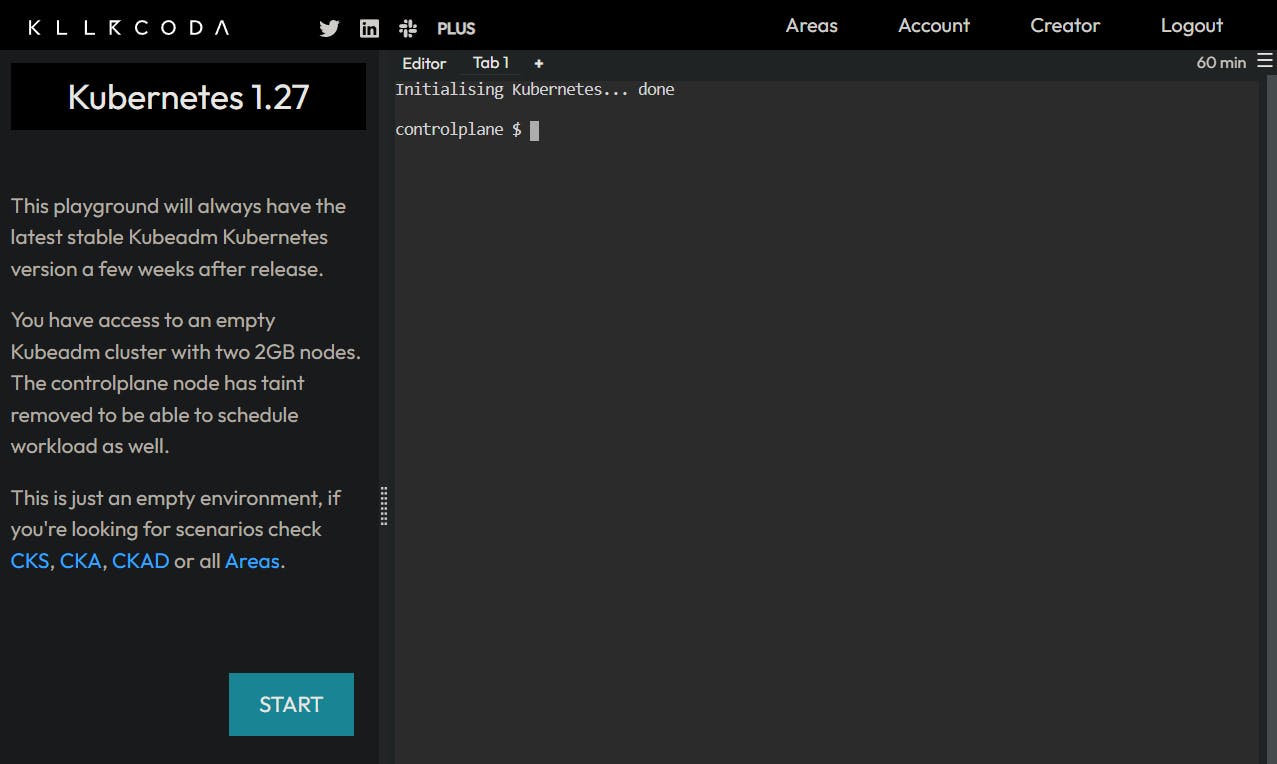
After logging on to https://killercoda.com/playgrounds, select the Kubernetes 1.27 environment. Click 'Start' and you'll get a 60-minute session and a terminal to experiment with K8s.
By the way, Kubernetes is also called K8s (because there are 8 letters between K and s :P).
Let's deploy your first container using Kubernetes, enter the following command in the terminal:
kubectl run nginx --image=nginx
Congrats 🎉 You created your first deployment (aka pod) and ran it on a "cluster". Let me explain what just happened:
kubectlis the cli tool used to interact with Kubernetes "clusters". A cluster is a group of nodes (physical or virtual machines) that work together to run a containerized application.runis a command in Kubectl used to create and run a deployment or a single instance of a containerized application called "Pod".In Kubernetes everything runs as a "Pod" and every pod has its own IP. It's important to note that Pods in Kubernetes can have multiple containers, and these containers share the same network namespace and IP address. Each container within the Pod is assigned a unique port, allowing them to receive traffic individually.
nginxis the name we gave to this deployment/pod, but you can choose any name.--image=nginxspecifies the container image to use for the deployment. In this example, we are using the Nginx Docker image, which is pulled from the docker hub.
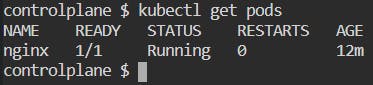
If you want to see the list of all the pods running, use kubectl get pods :
But it shows very limited information about the pods. To see additional information such as node name, IP address, etc. use the --o wide flag. This can be useful for troubleshooting or understanding the pod distribution across nodes. Just run the command kubectl get pods -o wide :

Let's try something more interesting than just running a pod with a container and seeing the list of pods.
So we have a pod named nginx running, which uses the nginx webserver container. How do you access this container?
Run this command: kubectl exec -it nginx -- sh
exec: This subcommand is used to execute a command in a container.-it: These flags stand for "interactive". It enable an interactive session with the container.-- sh: It specifies the command to be executed in the container, which in this case issh(the shell).
By entering this command, you can access the shell environment of the "nginx" container. So now you can perform various operations within the container, such as running commands, inspecting the container's file system, and more.
Try running curl http://localhost while inside the interactive shell of the nginx container:
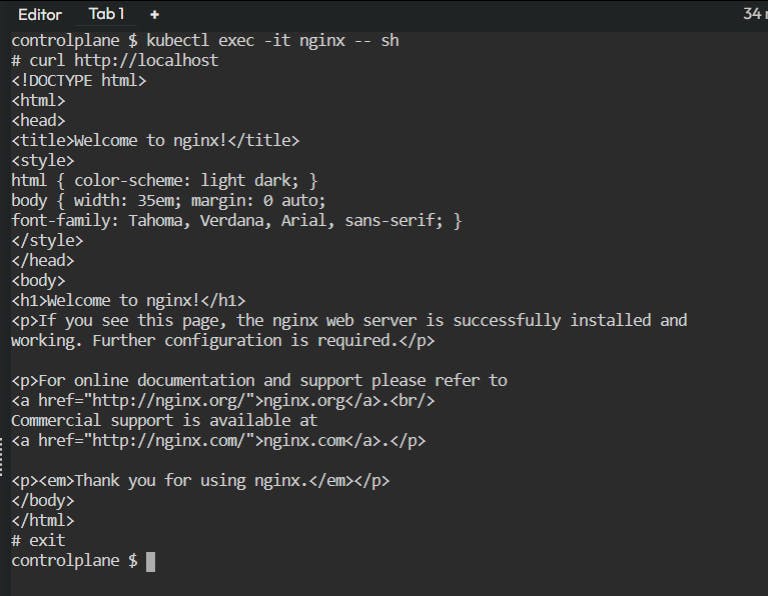
If the Nginx container is functioning correctly, you should see the HTML content of the "Welcome to nginx" page in the output of the curl command.
You can use the command exit to come out of interactive shell and back to the controlplane . But wait....what is a controlplane ???
Perfect. Now that you have some hands-on experience with using Kubernetes. We should get into how it actually works, how do pods function and what does the Architecture of Kubernetes look like? Let's go. 🚀
Kubernetes Architecture Explained
To understand the architecture of Kubernetes you need to understand how a "cluster" works. The cluster is the fundamental infrastructure required to run Kubernetes.
Clusters
A Kubernetes cluster consists of multiple nodes. Nodes are virtual or physical machines. These nodes work together to manage and run containerized applications.
Without a cluster, there is no Kubernetes infrastructure to manage containers and orchestrate application deployments. The cluster provides the necessary resources, networking, and coordination mechanisms for running and scaling containerized applications.
When we used Killercoda in the above walkthrough to experiment with Kubernetes functions, Killercoda provided us with a pre-configured cluster that was ready to use.
For local development and testing on your own machine, I'll show you how to use a tool called Minikube to set up a single-node Kubernetes cluster on your local machine.
A Kubernetes cluster has a very particular structure analogous to the Kubernetes Architecture. Let's break it down.
The Structure of a Cluster
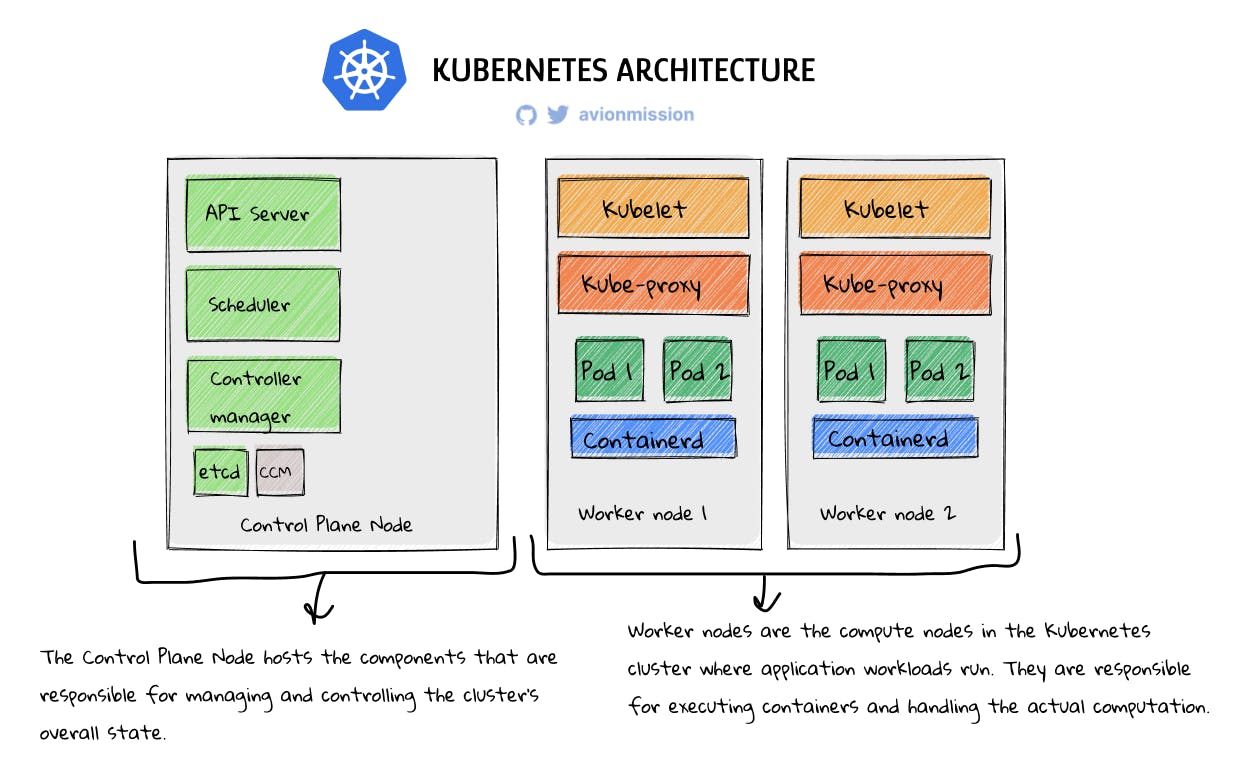
When you set up a Kubernetes cluster two kinds of nodes (physical/virtual machines) are established: Control plane nodes and Worker nodes. In the above example, there is one Control plane node and 2 Worker nodes. Let's understand what they do and what each of their components do:
Control Plane Node
The Control Plane Node hosts the components that are responsible for managing and controlling the cluster's overall state.
They are not created or replicated automatically when new pods are created. Instead, they remain stable to provide a consistent management and control layer for the cluster.
Let's understand the relevance of each component (refer to the above diagram):
API Server: It serves as the central control point for the Kubernetes cluster. It exposes the Kubernetes API, receives and processes requests from clients, and interacts with the etcd database.
etcd: It is a distributed key-value store that stores the cluster's configuration data and the state of the cluster. It provides a consistent and reliable data store for the control plane nodes.
Scheduler: It is responsible for assigning newly created pods to nodes based on resource requirements, node availability, and scheduling policies.
Controller Manager: It runs various controllers that monitor the cluster's state and perform actions to maintain the desired state. Examples include the Node Controller, ReplicaSet Controller, and Service Controller.
CCM (Cloud Controller Manager): It is an optional component that integrates Kubernetes with cloud provider-specific features and functionalities. It manages cloud resources like load balancers, storage volumes, and network configurations.
Worker Nodes
Worker nodes are the compute nodes in the Kubernetes cluster where application workloads run. They are responsible for executing containers and handling the actual computation.
Worker nodes, on the other hand, can be added or removed from the cluster dynamically based on scaling requirements or hardware changes. When a new worker node is added, it joins the cluster and becomes available to run pods.
The control plane components, including the API server and Scheduler, are responsible for scheduling pods to the available worker nodes.
In our example we have one Controle plane node and two Worker nodes. Be every worker node has the same components:
Kubelet: It is an agent running on each worker node that communicates with the control plane and manages the containers running on the node. It takes care of container lifecycle management, executing commands, and reporting the node's status to the control plane.
Kube-proxy: It is responsible for network proxying and load balancing within the cluster. It handles the networking tasks required for communication between services, routing traffic, and managing network policies.
pod 1, pod 2,..pod n: These represent the pods running on the worker node. A Pod, as mentioned earlier, is the smallest unit of deployment in Kubernetes, each pod can run multiple containers.
Container-d: It is the container runtime used to manage container operations, such as container creation, execution, and termination.
Now you understand the entire architecture of a Kubernetes Cluster. The Control plane node components collectively manage and control the cluster, while worker nodes are responsible for handling container management and execution.
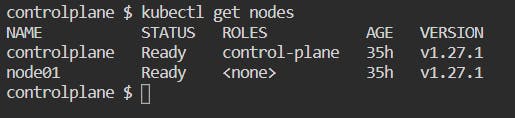
If you run the command kubectl get nodes in your Killercoda Kubernetes playground terminal. You can see there are two nodes running, one control-plane node and one worker node:
We have used Killercoda Playground to experiment with Kubernetes. But you can't rely on online playgrounds such as Killercoda to use Kubernetes because it only gives you 60 minute session time, after which all your work is lost.
Hence, you need to setup Kubernetes locally on your computer if you want experiment with and learn Kubernetes.
Minikube
For local development and testing, you can use a tools called Minikube. It allows you to set up a single-node Kubernetes cluster on your local machine. It provides a lightweight and convenient way to set up and experiment with Kubernetes without needing a full-scale production environment.
A "single-node cluster" means that the control plane node and the worker node are not separate, and all Kubernetes components, such as the API server, Scheduler, Controller Manager, etcd, kubelet, and kube-proxy, run on the same node.
In a single-node cluster, you can deploy and manage containers using Kubernetes concepts and APIs, just as you would in a multi-node cluster.
Minikube is an excellent option for learning Kubernetes. It provides a convenient and self-contained environment for understanding and experimenting with Kubernetes concepts, features, and workflows.
You can setup minikube on your local machine, based on your system using this guide from the minikube documentation. But before installing minkube, make sure you install kubectl using this guide.
Minikube provides a simplified way to set up a Kubernetes environment for development and learning purposes, and kubectl allows you to interact with the cluster and manage Kubernetes resources.
Working with Minikube
Once both kubectl and Minikube are installed, you can start using Minikube to create and manage your local Kubernetes cluster.
Run the command minikube start to create a local single-node Kubernetes cluster (make sure the Docker engine is running in your Docker Desktop app if you are a Windows or Mac user).
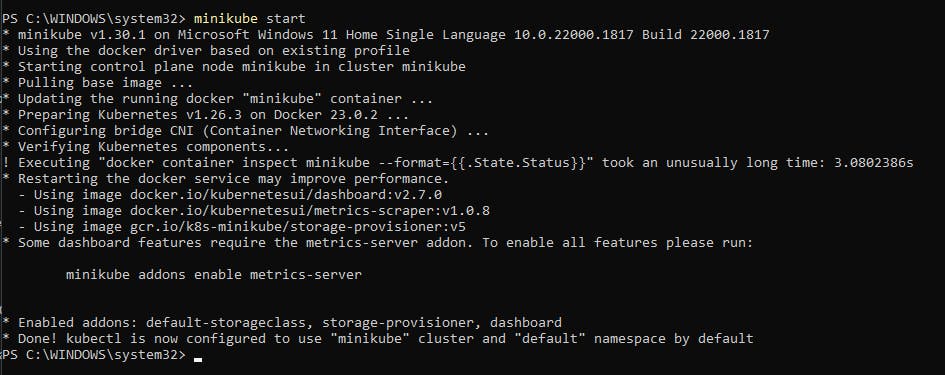
(Yes I'm using Windows in a DevOps tutorial, HARAAAAM, I know)
You can run the command kubectl get nodes, you can see that a node named minikube is running and it is assigned the role control-plane but in fact, it can also act as a worker node.
Now go ahead and ahead and deploy a Pod which uses the nginx container using kubectl, but WAIT!! we are not going to use the command kubectl run nginx --image=nginx which we used previously.
While the kubectl run command with the --image flag is convenient for quickly launching a Pod, using a Pod YAML file offers more control, flexibility, and understanding of the underlying Kubernetes configuration. It is particularly useful when working with more complex Pod configurations or when managing pods as part of larger deployments.
Here's how you can create a new Kubernetes Pod using a Pod YAML file:
Go to your project directory.
Create a file called
pod.yaml, it can have any name.Add this YAML code in
pod.yaml:apiVersion: v1 kind: Pod metadata: name: nginx-pod labels: app: nginx tier: dev spec: containers: - name: nginx-container image: nginxThis YAML file defines a Pod named "nginx-pod" with a single container named "nginx-container" based on the "nginx" image which it will pull from Dockerhub (if it doesn't find it locally).
Finally create the Pod using the
kubectl createcommand which is used to create a Kubernetes resource defined in a YAML file:kubectl create -f pod.yamlYou can check if the pod is running by using the command
kubectl get pods
Wrapping Up
In this chapter, we learned the fundamentals of Kubernetes. With the Killercoda online playground, we deployed our first container using Kubernetes and the kubectl command-line tool. We also understood the architecture of Kubernetes, consisting of control plane nodes and worker nodes.
You have setup Minikube, a tool for creating a local Kubernetes cluster. With this knowledge, you are ready to dive deeper into Kubernetes and DevOps. In a future chapter, we also dive into the Advanced concepts of Kubernets.
Remember, this is just the beginning of our DevOps journey! We will be covering a range of topics in this DevOps Essentials series. Never miss an episode, by subscribing to the newsletter. 👇