


Welcome to the first chapter of the series DevOps Essentials, where we will be exploring the fundamentals of Docker.
This series is specifically designed to help students and developers who are new to DevOps gain a solid understanding of all the essential Cloud Native tools.
Throughout this series, I plan to cover everything you need to learn to master DevOps, from the basics of Docker & Kubernetes to more advanced topics like CI/CD, Service Mesh, Infrastructure Monitoring, and more. Make sure to subscribe to our newsletter so you don't miss an episode. Let's Begin!
The Story of Docker
Instead of starting with a definition of Docker, let's start with understanding what problems led to developers creating Docker. What problem did it solve?
In the early days of software development, building and running applications on different computers was a major challenge. Developers would often encounter issues with compatibility and system dependencies, which would take hours, if not days, to resolve. Moreover, setting up the servers and computers that hosted the applications was a tedious and time-consuming process.
Before the advent of Docker and containerization, when developers worked together, they often struggled and had frustration related to dependency and environment conflicts.

However, the advent of containerization technology has revolutionized the way we build and run applications. Docker, in particular, has become the go-to tool for developers and IT professionals who want to simplify and streamline the application deployment process.
So, what is Docker, and how does it work? In simple terms, Docker is a tool that allows developers to run their applications in an isolated environment known as a "container." A container is essentially a lightweight, portable package that contains everything needed to run an application, including the code, runtime, system tools, libraries, and dependencies.
With Docker, developers can create a container that can run on any computer, regardless of the underlying operating system or hardware. This solves the problem of the infamous phrase "but it's working on my computer," which developers often encounter when collaborating on projects. Docker ensures that everyone is working in the same environment, regardless of their local setup.
Difference between Container and Image
You might notice me using the words "container" and "image" interchangeably but the two are different. Beginners often get confused between the two so it's important to understand the difference.
An image is essentially a read-only template that contains the instructions for creating a Docker container. It is a snapshot of a Docker container that includes the application code, libraries, dependencies, and any other files or configurations required to run the application.
On the other hand, a container is a runnable instance of an image that can be launched and stopped. When you start a container, Docker creates a writable layer on top of the image that allows you to make changes to the container without affecting the image itself. This writable layer is also deleted when the container is stopped or removed.
In summary, an image is a static snapshot of an application and its dependencies, while a container is a dynamic, running instance of that image.
The Docker Architecture
Now that you understand what problem Docker solves and what it basically does, we'll get into the specifics. Let's talk about the different components and terms related to the Docker Architecture:

Runtime: The runtime is the environment where the application runs, including the operating system, libraries, and dependencies.
Docker Engine (daemon): The Docker engine handles tasks such as creating, starting, stopping, and removing containers, as well as managing the storage and networking required for the containers.
Orchestration: Orchestration refers to the process of managing multiple Docker containers as a group, which can be achieved using tools like Kubernetes and Docker Swarm.
Docker client: The Docker client is the primary way that users interact with Docker. It accepts commands from users and communicates with the Docker daemon to execute those commands.
Docker host: The Docker host is the physical or virtual machine where the Docker daemon runs. It is responsible for running containers and managing their resources.
Docker registry: A Docker registry is a central repository where Docker images are stored and distributed. The most commonly used registry is Docker Hub, which is a public registry that anyone can use to store and share their Docker images. However, organizations can also set up their own private registry for added security.
Installing Docker
To use Docker on different operating systems, developers need to install Docker Desktop on Windows or Mac, while Linux users can run Docker as it is. Once Docker is installed, developers can use a variety of commands to build and manage containers.
Once you have docker installed, you should be able to use the docker command, check the version of docker installed in your system using docker -v
Let's start by running your very first docker image by running:
docker run -t hello-world
When you run the docker run -t hello-world command:
Docker first checks if the
hello-worldimage exists on your local machine.If the image does not exist locally, Docker will download it from the Docker Hub registry.
Once the image is available, Docker creates a container from the image and then starts the container.
In this case, the
hello-worldcontainer simply prints a message to the console, indicating that the Docker installation is working properly.
Building your own Container!
Now I will teach you how you can build your own container using Docker. For this example, we will use one of my open-source applications. You can go to this link and clone the app if you want to follow along:
The first step to building your Docker image is to write a Dockerfile. A Dockerfile is a text file that contains instructions on how to build your Docker image. You can simply name it
Dockerfile(without any file extension) and store it in the root folder of your app.Here's the code for the docker file of my application:
 # This Dockerfile builds the React client and API together

 # Build step #1: build the react front end
 FROM node:14-alpine as build-step
 WORKDIR /app
 ENV PATH /app/node_modules/.bin:$PATH
 COPY package.json package-lock.json ./
 COPY ./src ./src
 COPY ./public ./public
 RUN npm install
 RUN npm run build

 # Build step #2: build the API with the client as static files
 FROM python:3.10
 WORKDIR /app
 COPY --from=build-step /app/build ./build

 RUN mkdir ./api
 COPY api/requirements.txt api/api.py api/.flaskenv ./api/
 RUN pip install -r ./api/requirements.txt
 ENV FLASK_ENV production

 EXPOSE 3000
 WORKDIR /app/api
 CMD ["gunicorn", "-b", ":3000", "api:app"]
Explanation of the Dockerfile
It's better to understand how to write a Dockerfile by example. Keep in mind that the Dockerfile is simply the instructions for how to build and run your app in the docker image/container.
The above Dockerfile has two build steps and each step is defined by a FROM statement that sets the base image for that step.
The first build step starts by using the node:14-alpine base image to build the React front-end. It sets the working directory to /app and adds the node_modules/.bin directory to the system's PATH. The package.json and package-lock.json files are copied to the working directory, and the npm install command is run to install the necessary dependencies. Then, the src and public directories are copied to the working directory, and the npm run build command is run to build the React app.
The second build step starts with the python:3.10 base image, and it copies the built React app from the previous build step by using the --from flag. Then, it creates a new directory called api and copies the requirements.txt, api.py, and .flaskenv files to it. After that, it installs the necessary Python packages by running pip install -r ./api/requirements.txt and setting the Flask environment variable to production. Finally, it exposes port 3000, sets the working directory /app/api, and starts the API by running the CMD command gunicorn -b :3000 api:app.
The docker will differ from project to project depending what are the steps and resources required to build and run the app.
Now, back to building our docker image...
Build the Docker image: Once you have your Dockerfile, you can use the
docker buildcommand to build your Docker image. In our case the Dockerfile is in the current directory, you can run the following command which follows the templatedocker build -t username/myimage:docker build -t avionmission/smartfeedaiThat's it! this command will build the Docker image and tag it with
username/myimagewhich in my case isavionmission/smartfeedai. After you have built your Docker image, you can test it by running a container based on the image. You can use thedocker runcommand to start a container. For example:docker run -it 3000:3000 avionmission/smartfeedaiThis command creates and starts a container based on the
avionmission/smartfeedaiimage, opens an interactive session with the container, and maps the port3000in the container to the port3000on the host machine. You can use the app at localhost:3000 on your computer.
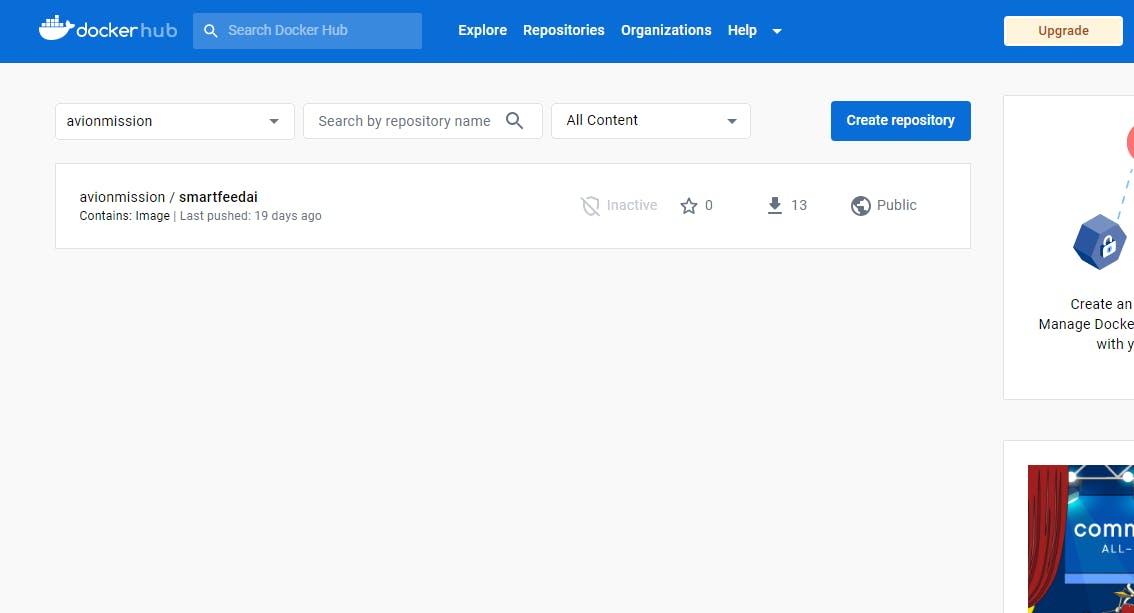
Pushing your Docker Image to DockerHub
Dockerhub is the most commonly used Docker registry (a central repository where Docker images are stored and distributed). Once your docker image is uploaded to DockerHub, anyone from anywhere in the world can run your docker image in their system. Here are the steps to push your docker image to DockerHub:
First, ensure that you are logged in to Docker Hub on your local machine using the
docker logincommand. You will need to provide your Docker Hub username and password to authenticate.docker loginNext, navigate to the directory where your Dockerfile and any necessary files are located.
cd /path/to/your/dockerfileYou can verify that your image was created in the previous step by running the
docker imagescommand.docker imagesFinally, push your image to Docker Hub using the
docker pushcommand using the templatedocker push username/myimage:docker push avionmission/smartfeedai
Conclusion
Congratulations!! 🎉🎉You've learned how to write a dockerfile, build a docker image, run your containerized application, and push it to Dockerhub.
I hope this guide has been helpful in understanding the fundamentals of Docker and how it can be used to streamline the deployment process.
Follow me on Twitter @avionmission for more updates and insights into the world of DevOps. Let's continue on this exciting journey of mastering DevOps together!
Remember, this is just the beginning of our DevOps journey! We will be covering a range of topics in this DevOps Essentials series. Don't miss an episode by subscribing to the newsletter. 👇