

Using OAM and Napptive to Deploy an AI-powered React App
(and we don't know what Kubernetes is)


Are you curious about how a team of front-end and mobile developers learned about backend development and DevOps in just two days? My teammate, Siraj Alam, and I participated in the WeMakeDevs x Napptive Hackathon, where we got hands-on experience with things we had zero knowledge about 3 days ago: setting up a web server, containerizing an application using Docker and Dockerhub, and deploying our application using Napptive. The last 3 days have been a wild ride.
Our background in front-end and mobile development made sure that we knew absolutely nothing about Docker let alone Kubernetes, getting into this hackathon, but we learned. Thanks to Napptive, you don't really need to know a lot about Kubernetes to start deploying your application (more on this later :).
In this blog post, I will share everything we learned: the use case for OAM and Napptive platform, and how we built an AI-powered React app for the hackathon and deployed it using Napptive. If you're interested in learning about backend development, DevOps, and Ai, this post is for you!
The Project Idea: AI in the Backend, React in the Frontend
Are you worried that artificial intelligence will lead to the decline of blogging and written content by humans? Many people share that concern. However, my teammate Siraj Alam and I have a different perspective. We believe that AI can enhance the reading experience for people who like online, making it more efficient and enjoyable.
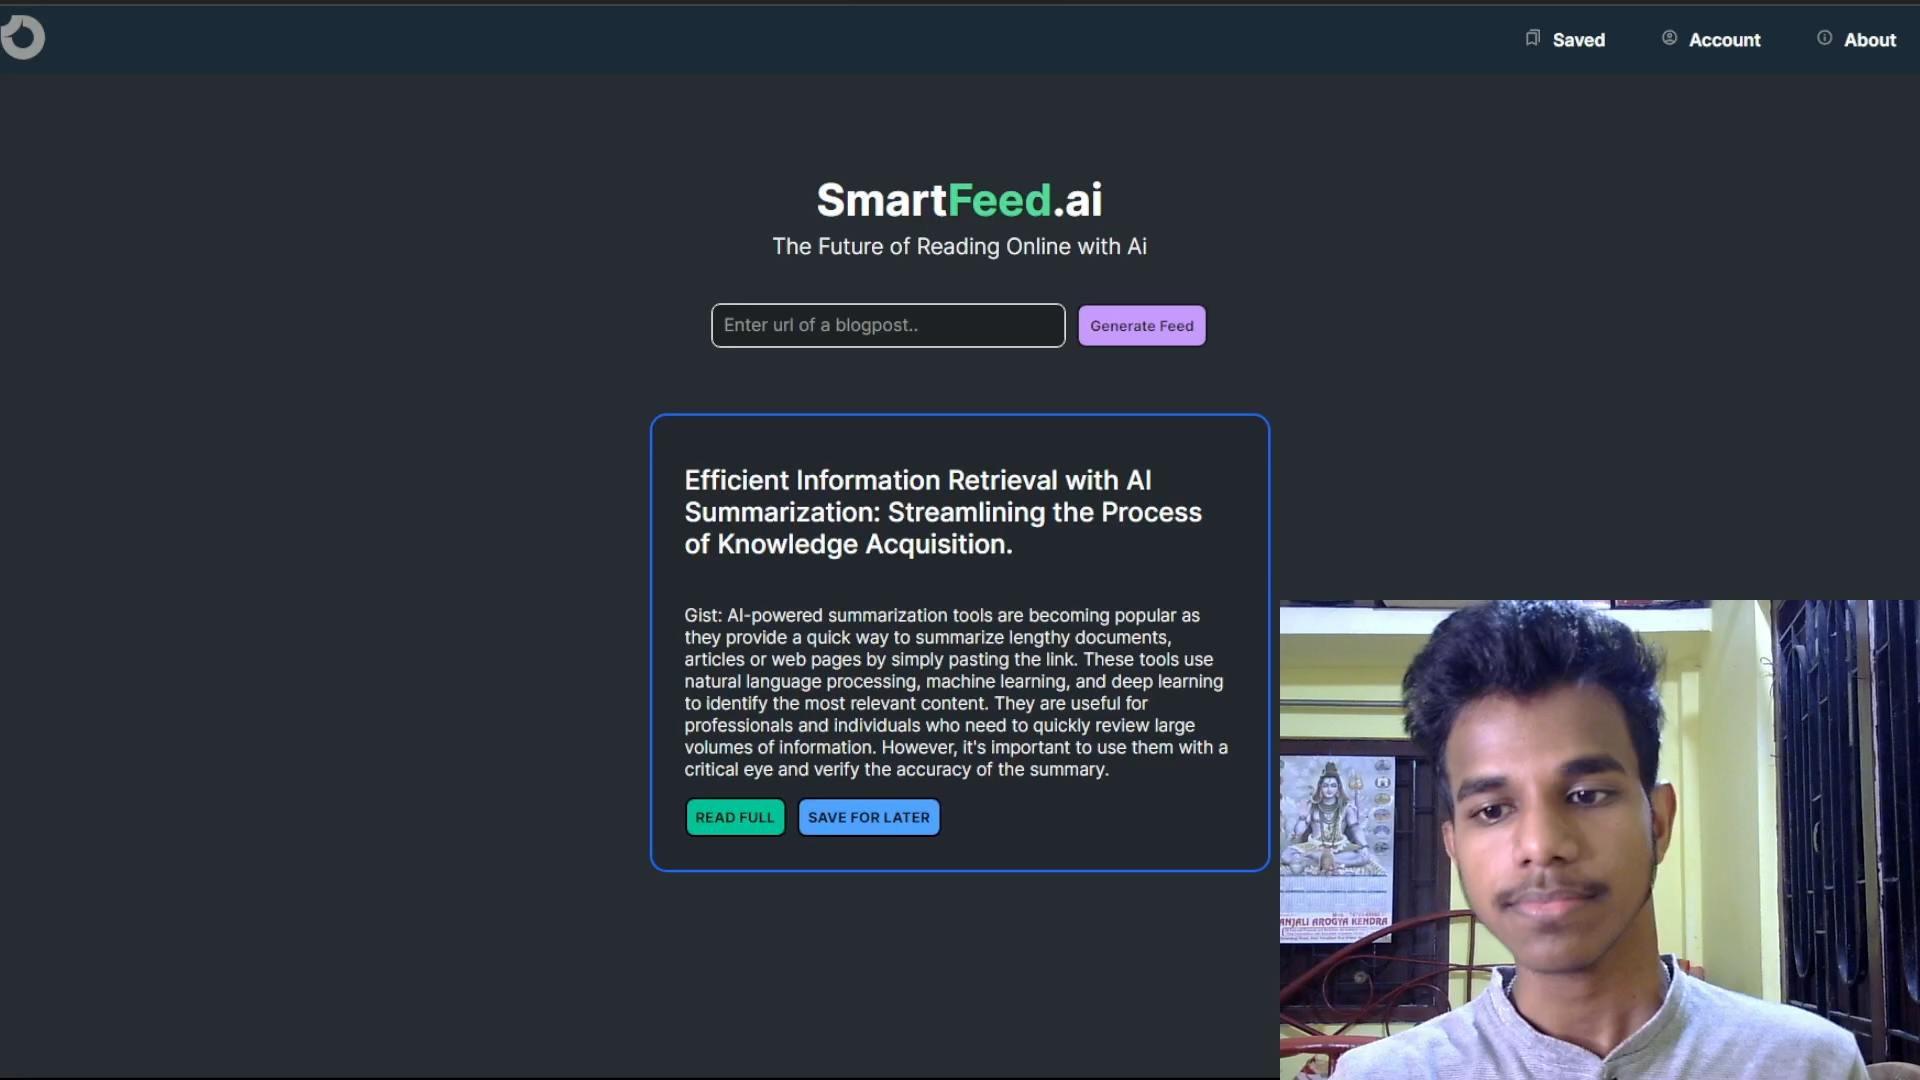
To showcase this, we built SmartFeedAi, an AI-powered React app that provides users with summaries of articles and blogs. Our MVP version had limited features due to the time constraints of the hackathon, but we see huge potential for the full-fledged version.
During the hackathon, we spent a lot of time figuring out the algorithm for summarizing text using the NLP libraries of Python. We chose React as the front end and Python with Flask as the backend because Python has a lot of machine-learning libraries. While we initially tried using PyTorch for the text summarization task, it proved to be too heavy for the backend.
Ultimately, we used NLTK and old-school NLP algorithms to summarize the text, which made our app much faster. We also want to emphasize that AI is not just machine learning.
Tokenization was one of the key concepts of NLP we learned and used in the project to build the algorithm for summarising text. It involves breaking text into smaller pieces called tokens. These tokens can be words, phrases, or sentences. Tokenization is an important part of NLP and is used in many AI applications.
We also wanted to make it clear that AI is not just machine learning. Many other techniques and algorithms fall under the umbrella of AI. Our project was a great example of how AI can be used to solve real-world problems, even without using machine learning.
But wait, what is OAM again?
Deploying an application in Kubernetes can be a challenge for developers without much experience in DevOps. This is where Napptive comes in. Napptive helps developers deploy their applications in Kubernetes without requiring a heavy knowledge of Kubernetes. It does that by using something called OAM.
OAM, or the Open Application Model, is a set of guidelines that simplifies the process of building and deploying cloud-based applications. It provides developers with standard building blocks like components, parameters, and traits, which makes it easier to create and manage cloud-based applications that work on any platform. With OAM, developers can focus on building the application without worrying about the underlying infrastructure. It will all make sense once you open Napptive Playground and start deploying your application.
Great! Now that you have a basic understanding of what OAM is and how Napptive can help you deploy your application, let's get started. But before we jump into the step-by-step process of deploying your application using Napptive, there is one crucial step that you must complete: Dockerize your application.
If you're new to the world of DevOps, you might not be familiar with Docker. Dockerization is the process of packaging an application and its dependencies into a single container, which can then be easily deployed to any environment that supports Docker. Don't know how to Dockerize your app? Neither did I 2 days ago! Go learn and come back to this post.
Dockerizing your application is the first step in deploying it in a cloud-native environment. Once you have Dockerized your application, you'll see how easy it is to define your application components using OAM and deploy your application on Napptive. So, let's get started!
How to Deploy your Docker Image on Napptive Playground: Step by Step
Once you create an account and sign in to Napptive Playground, you get a free environment with 1 CPU core, 4GB Ram, and 1GB memory which you can use to deploy your applications.
Here's how you can deploy your docker image to Napptive Playground:
Step 1: Go to the Catalog section in the navigation area on the left of the screen.
Step 2: Click on Upload App and fill in the details.
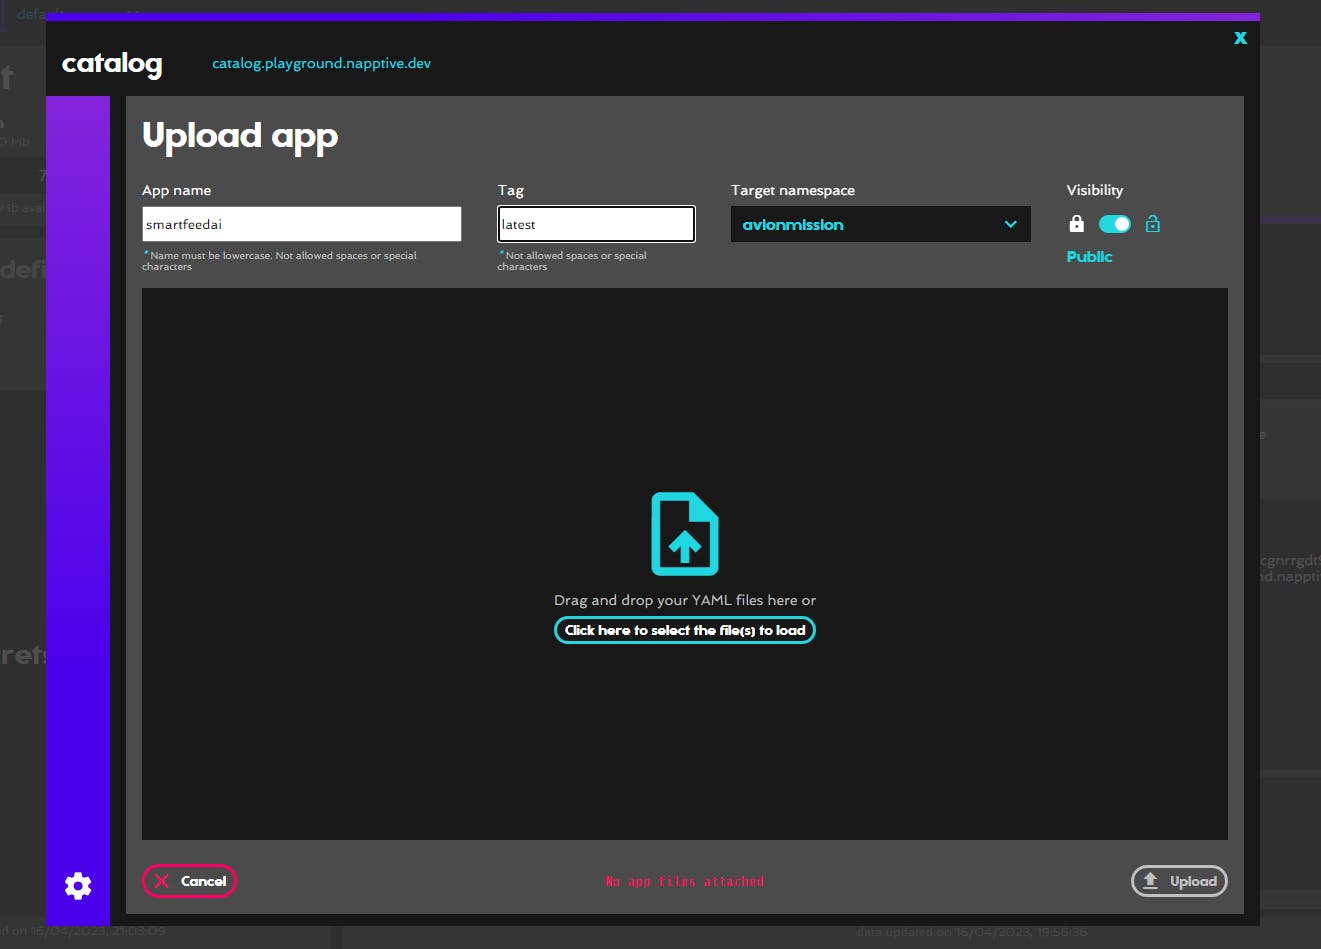
Step 3: Click on "Select files to load" and this is now you need three files
1) A YAML file that describes OAM specifications, here's ours:
apiVersion: core.oam.dev/v1beta1
kind: Application
metadata:
  name: smartfeedai
  description: "An Ai powered React App for readers."
spec:
  # List of components that are part of the application.
  components:
    - name: app
      type: webservice
      properties:
        image: avionmission/smartfeedai:latest
        cpu: "200m"
        memory: "256Mi"
        ports:
          - port: 3000
            exposes: true
        env:
          - name: LAUNCHER_TARGET_REPO
            value: https://github.com/avionmission/smartfeedai
      traits:
      - type: napptive-ingress
        properties:
          port: 3000
          path: /
2) A README.md that describes what your app does.
3) An app-name.metadata.yaml that defines things like your logo which will appear in the Napptive Playground catalog and more. Here's what ours look like:
apiVersion: core.napptive.com/v1alpha1
kind: ApplicationMetadata
name: "SmartFeedAi"
version: "latest"
description: An ai powered react app for readers
keywords:
  - "smartfeedai"
  - "nlp"
license: "SSPLv1"
url: "https://github.com/avionmission/smartfeedai"
doc: "https://github.com/avionmission/smartfeedai"
logo:
  # Do not hotlink images without permission :)
  - src: "https://raw.githubusercontent.com/avionmission/blog/a76df3f27a343556a6f4028a38d1da005617fcf8/assets/smartfeedicon.svg"
    type: "image/png"
    size: "120x120"
Step 4: Click on Deploy! and go to the deployment area. You will see there's a log section that shows that your app is running and an endpoint URL to access your deployed app.
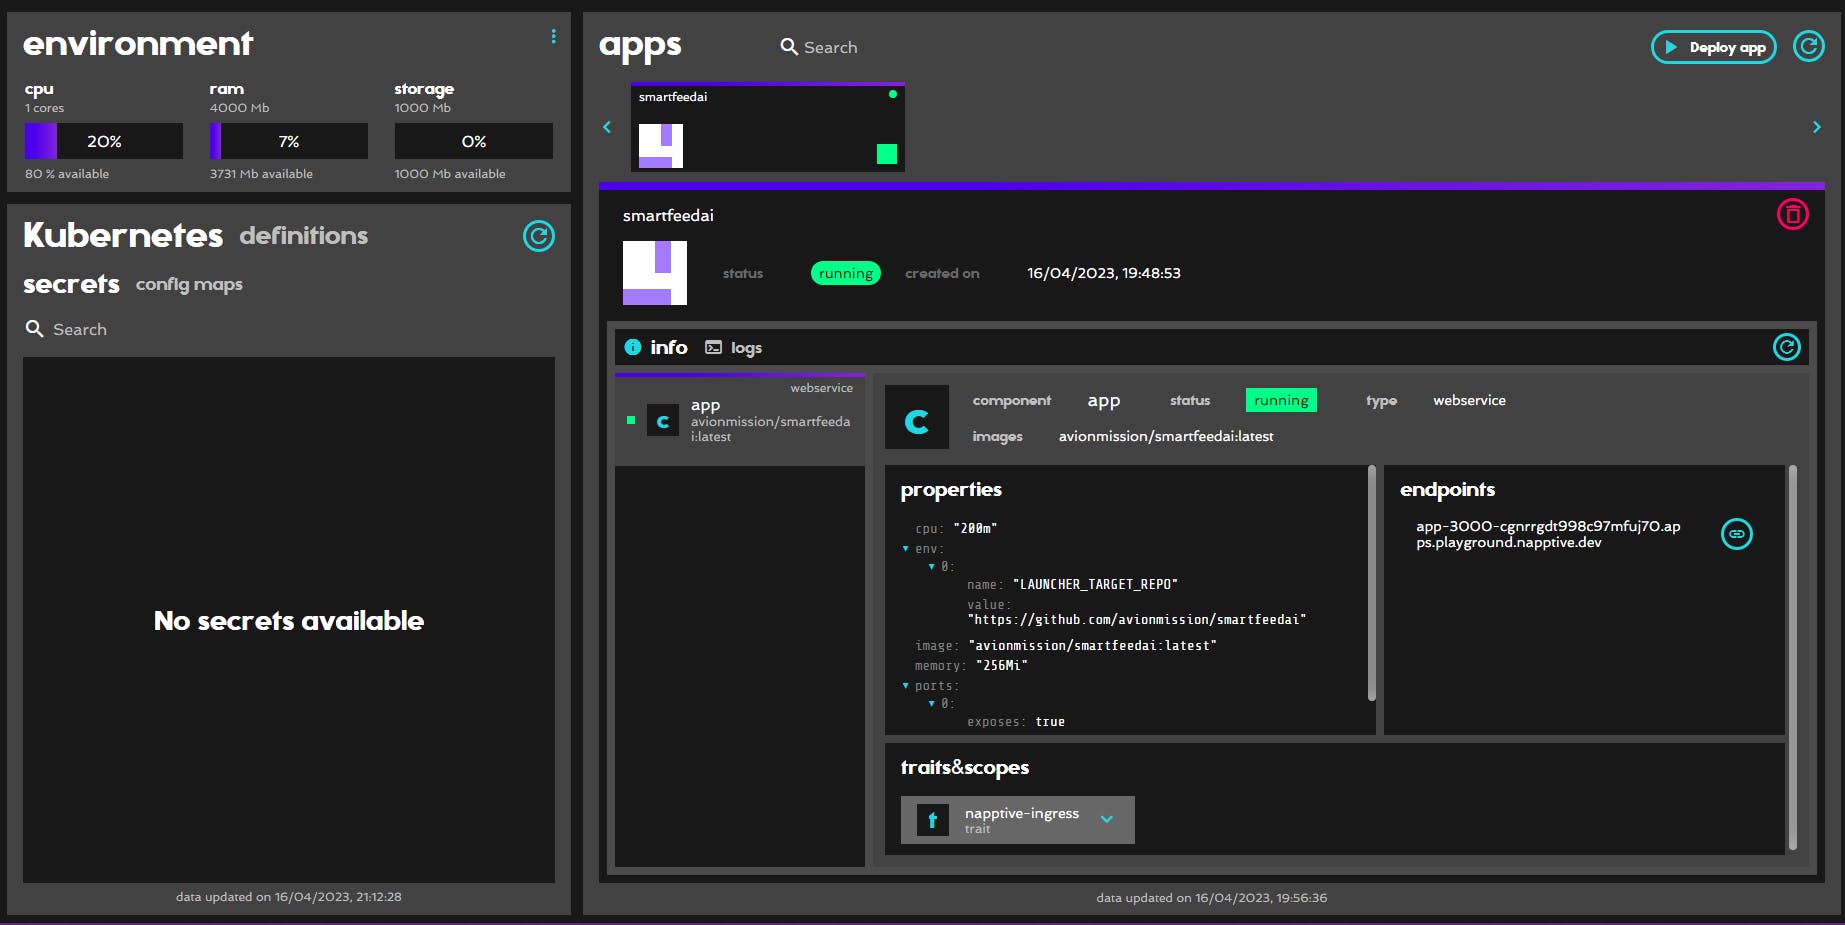
Step 5: Done! 🎉 Congratulations you have deployed your app on the Napptive platform.